Encrypting email on iOS and iPadOS has always been very difficult. S/MIME, the only built-in approach on Apple devices, is antiquated, complicated, and inefficient. SecureMyEmail was built to give Apple iPhone and iPad users easy modern encryption for their email. Free plans, as well as 30-Day Free Trials are available. You can just download the app, and be sending an encrypted email, with your current email address, a few minutes from now. Or, if you would like a preview, here you go:
Step 1: Install the SecureMyEmail app and sign up for free or for the free trial.
Download and launch the SecureMyEmail app from the Apple Store or our downloads page on your iPhone or iPad. If you're already a user, choose Sign in. If you're a new user, choose Sign up.
Fill in your info., the primary email you want to secure (you can add more or change this later), and create an account password. Now just click Sign Up.
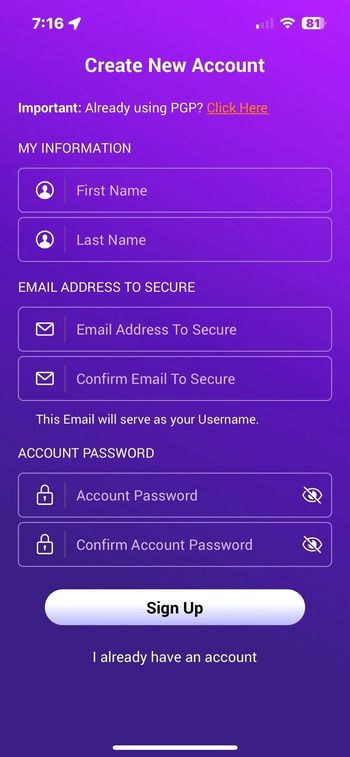
We're setting up a single Gmail.com account, which, like a Yahoo.com, or Microsoft consumer email account (outlook.com, hotmail.com, msn.com, etc.), is free to use with SecureMyEmail. If you have a different domain, or need to encrypt multiple email accounts, you should choose the free trial.
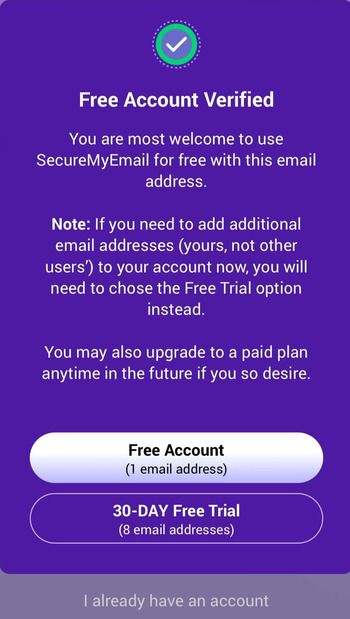
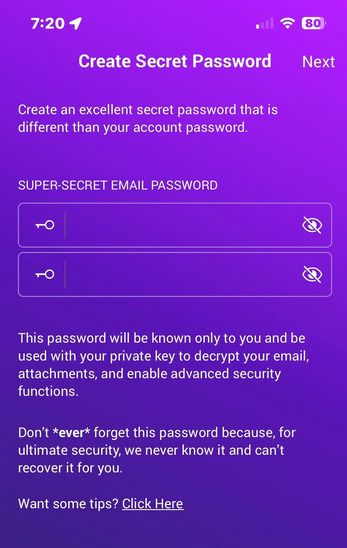
Step 2: Create secret password and your encryption keys.
You'll now be asked to create a secret password. Your secret password creates your encryption keys and is "key" (sorry) 🙂 to the whole thing. You can change it later, but it's good to choose a solid one. It's also very important that you never forget it. We strongly recommend that you write it down and keep it somewhere safe.
If you do forget it, we've designed it so you can easily generate a new secret password but, for obvious security reasons, you won't be able to decrypt the old email you sent with the previous one until you remember it. So, yeah, write it down somewhere safe.
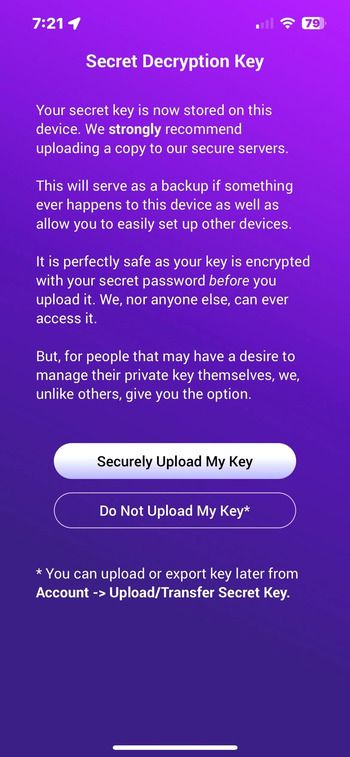
Step 3: Upload your encryption keys. Or, not.
Next, we'll ask you to upload your encryption keys to our secure servers. The uniquely cool thing is we actually ask. Most (all?) encrypted email providers host your private decryption keys on their servers by default.
But, honestly, unless you're a cryptographic expert prepared to store your keys, you should definitely upload them as a backup and so you can easily set up your other devices.
It's totally safe to do so as we encrypt your keys with your secret password before they even leave your device. In short, we, nor anyone else, can see your private encryption key or ever access it. It's what we call "zero-knowledge" architecture in the security biz.
It ensures that no one, including us, can ever access your end-to-end encrypted email. It's also why you really need to write down that secret password unless you have infallible memory.🙂
Step 4: Log into your email provider.
Okay. We're pretty much done. Last step is to set up your email provider.
Because we are encrypting a Gmail address, we'll run through that option. If you use a different email provider, or several, you will see something like below, including "Other/Manual" if your provider is not a major one.
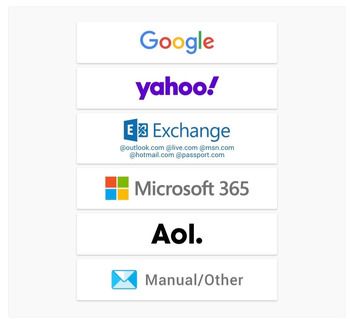
If your email provider is not a major one, we will attempt to fill in your email server info for you. If it doesn't connect, you'll need to edit your email provider's IMAP server settings.
NOTE: If you are encrypting iCloud, Fastmail, Zoho Mail, or some other email providers, they may require an "app-specific" password that you must use instead of your usual mail password. Below are links to their pages to set one up:
Zoho Mail (optional)
But, back to encrypting our Gmail address.
Click on the big Google button and follow the steps. We are tied directly into Google's OAuth framework for best security and so you can use Google Sign-in.
Google uses laughably scary language on these screens. Just know that it is ONLY the APP that has "access" so you can manage your email.
We, as a company, NEVER have access to your email or contacts.
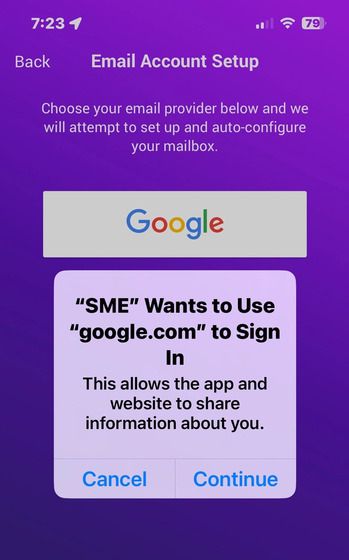
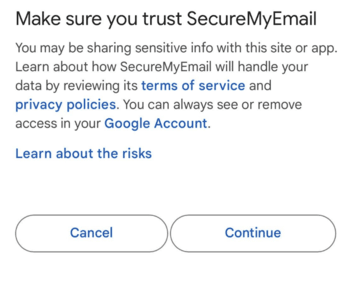
You're done!
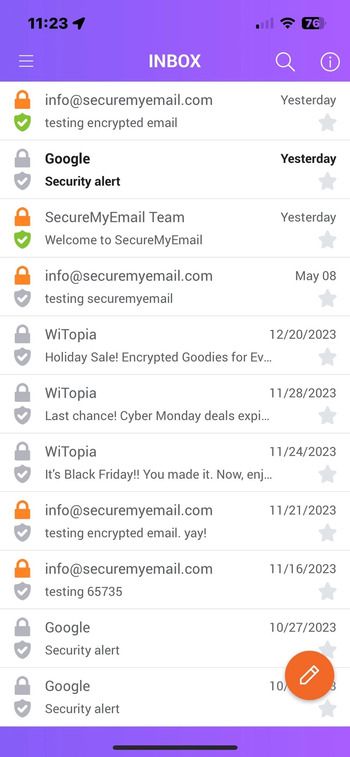
Ok. Boom. After signing into your mail provider successfully, you should land in your new INBOX and your email should load. If that doesn't happen, and you're not sure why, please contact our support team. Sometimes another program can conflict. A VPN, security program, firewall, etc.
Step 5: Compose your message.
From INBOX, just click the orange circle in bottom right corner and compose your email.
We'll send one to our info@securemyemail.com address as it is not signed up with SecureMyEmail. This way, you will see what happens when you send to a regular non-user.....which most people you send to will be.
Note: If you send to another SecureMyEmail user, the email will send without additional steps and they will just see the encrypted email in their software. But, the primary idea of SecureMyEmail is to make it easy for you to send encrypted email to NON-users.
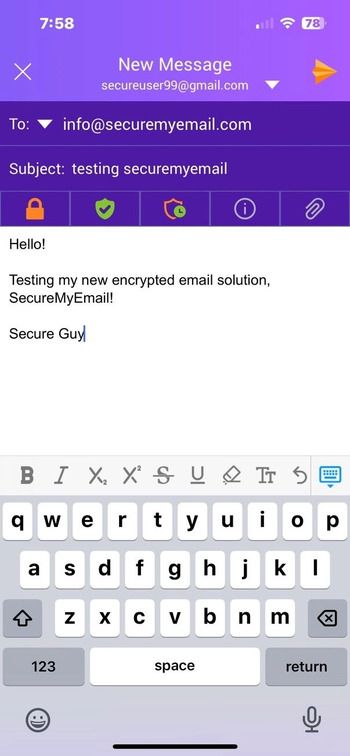
Step 6: Choose your encryption level, expiration time, and send your encrypted email.
You've composed your email and when you click the airplane to send, you will see two encryption options: (Send Encrypted and Send Encrypted+).
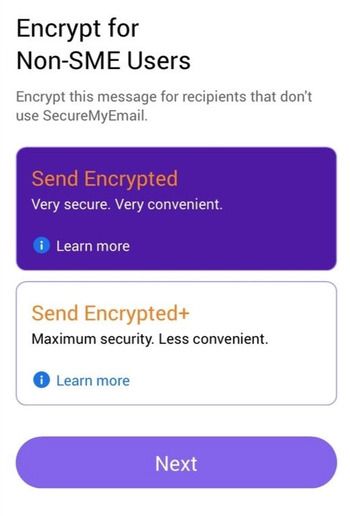
OPTION 1: SEND ENCRYPTED (NO PASSWORD REQUIRED BY RECIPIENT)
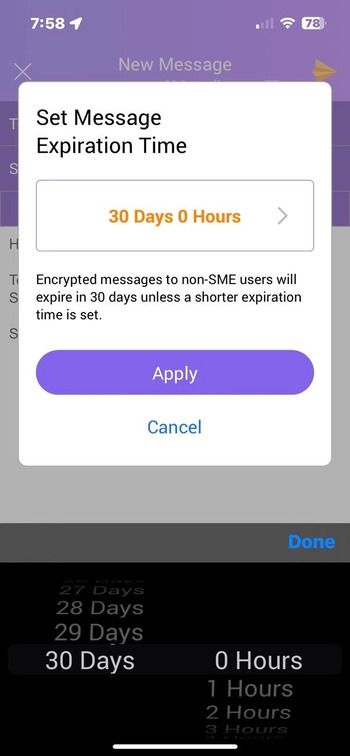
This is the default setting. Just click NEXT, select an expiration date (one hour up to 30 days) and send your encrypted email. That's it!
NOTE: Even though we forever delete the message from our servers upon expiration, you will always retain an encrypted copy of the email in your SENT and ENCRYPTED folders if you ever need to review or resend. It will be encrypted with zero-knowledge encryption so nobody but you can access it!
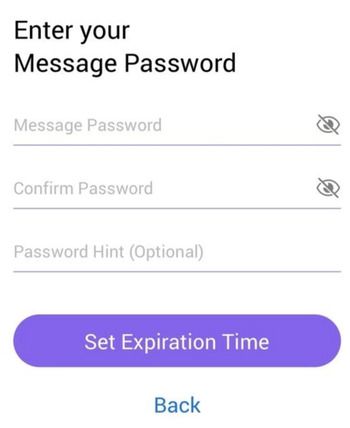
OPTION 2: SEND ENCRYPTED+ - If you choose this method, as already discussed, even extraterrestrials cannot access it (unless someone gives up the password during their "probing.") ;-)
This option requires the recipient to know a password to decrypt the email. You will create and enter this password as shown below and then send it to your recipient via text, phone, or just use the optional HINT field so they can deduce it themselves.
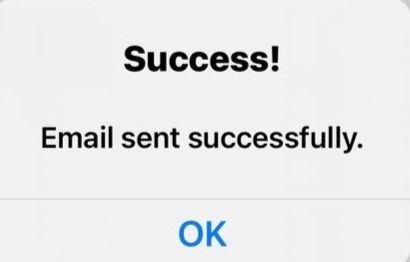
After that, just choose expiration time, and SEND. That's it.

What will my encrypted email recipients see?
They will just receive a regular email (we'll tell them it's encrypted in the subject so they notice it) with an encrypted weblink that will take them to our secure server.
This will open up a browser window where they can securely read, download any files you sent, reply, and attach files of their own. Their replies are fully protected by encryption back to you.
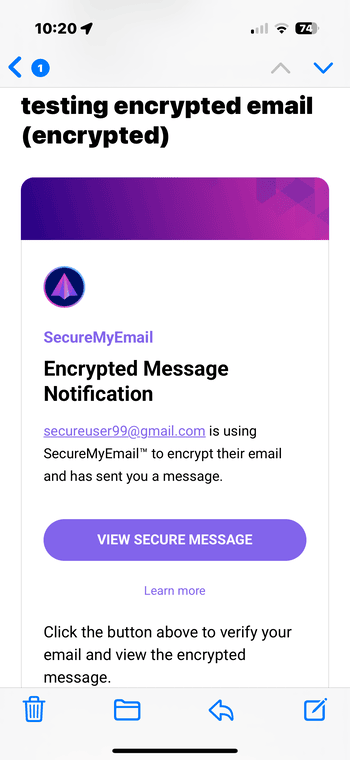
After confirming their email address, they will be able to view secure message and reply securely.
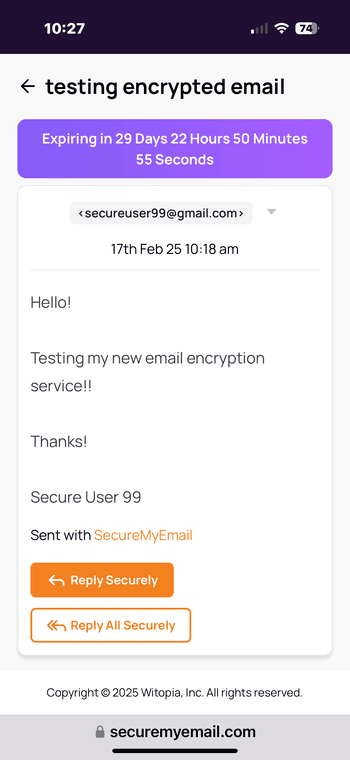
Note: You'll see encrypted replies in all your unsecure email clients too, but you will need to use the SecureMyEmail software on any of your devices to send and read encrypted email.
Give SecureMyEmail™ a try and you'll be able to send encrypted email from your iPhone (iOS) and iPad (iPadOS) to anyone on Earth within a few minutes. Contact us with any questions!
- Encrypt your personal and business emails.
- All VPN Features, Protocols, and Stealth Modes.
- Unconditional 30-Day
Money-Back Guarantee.


 By
By 


